The paint job on this AT-ST is the result of a lively and supportive miniature painting community. At this point I cannot count the number of tutorials I have read or watched and slowly but a lot faster than if I would have been on my own I got better.This AT-ST is still a far cry from what the pros like the guys at Painting Buddha can create but still I am happy and I want to give back to the community by sharing my experiences. So this is why I am writing this. Hopefully somebody finds this useful as I found so many other tutorials useful.
1. Preparation
For painting this miniature the way I did it is highly important to properly clean the model before. Mold lines that have not been removed in this stage will become highly visible later on. So take your time and remove them using a hobby knife and small files.2. First basic colouring
I primed the miniature in black using Valejo Black Primer through a cheap airbrush. The next step was a dark grey (Vallejo Air German Grey). Again I was using an airbrush and sprayed mostly from the top and the sides. I hit almost the whole mini with it but some areas only received a thin coat to create a smooth transition from dark to slightly brighter. These transitions than were continued using a middle grey. The last step was using light grey for the brightest highlights. It is very important to leave some difference to white as we will need this contrast later when we highlight the edges. At the end of this stage I had the following intermediate result.
3. A first layer of dirt
After I had applied the base colors the grey looked somewhat boring to me and I decided to have the model show that it was stationed on some backwater planet for a while. I just had acquired the full set of Minitair ghost tints and had already made some pretty awesome experiences on other models. For those who do not know them: The ghost tints are airbrush colors that are highly transparent and depending on how many layers you apply they tint the underlying surface more or less.
So I picked those again. I thinned down the brown ink a lot and applied multiple layers focusing on the legs of the mini. I wanted to have a very subtle effect of the brown being stronger on legs and feet as those would be affected by the muddy swamp environment of my backwater planet the most.
Usually I would now focus on deepening the shadows by applying a wash. The contrasts were already great at this point and I wanted to see what I would end up with after I highlighted edges of the mini.4. Edge highlighting
The area shading of the first colors already produced nice contrasts and you could stop at this point as the result is already pretty convincing. This would leave out one the best opportunities when painting edgy miniatures like this AT-ST. Using a very controlled edge highlighting will make the shapes of it a lot more visible and the added detail has the model look a lot more convincing.
I usually do two layers of edge highlights. The most important lesson I learned: Do not highlight all edges. Only edges that would be affected by the imaginary light source should be highlighted. I used a very light grey for the first layer of highlights.The second layer was done with white. These highlights are focused on corners and very sharp edges.


5. Oil Wash
After the edges were highlighted I was really happy. This model benefits a lot from doing a good edge highlighting. And I wanted to strengthen that effect even further by contrasting the edges agains the recesses. A technique that works very well here is an oil wash.First I applied a gloss varnish to the miniature. I used Humbol Clear applied through the airbrush for that. This has two effects. It protects the thin color layers I already had applied. The reason for using the gloss varnish is to make it even easier for the oil wash to flow into the corners and recesses. An oil wash is simply highly diluted oil color. You could use normal acrylic washes here but they have one significant draw back. Once dried you cannot remove them anymore. The oil wash can be cleaned away using some white spirit and a q-tip or a brush.
As I liked the coloring of the surface already I did not want to "dirty" it further. So I decided for a pin washing. Pin washing means that you apply the wash directly and as neat as you can to the recesses and corners. Of course I was not as neat as I wanted to be but as I was using an oil wash I still left it to dry as I could remove the stains later with the white spirit. After everything was dried and cleaned I saw that my oil wash had been too thin. So applied a second layer where I found the first was not strong enough.
After that was done I fixed up a few of the highlights that had been darkened by the oil wash.


Above you can see the difference between the base colors and the result after ghost tints, edge highlighting and oil wash. Some of the more yellow tint was caused by a slightly more yellow light when taking the second picture.
6. Streaks and damage
The first step was the damage. I used the sponge technique for that. It is a simple but very effective technique. I use a very small piece of sponge that I had ripped out of a bigger one and apply a mix of black and gun metal color to it. It should be really dark with only a hint of metallic effect in it. This sponge is than dipped onto areas on the model that could have been damaged. It is important to turn the sponge and even change it to avoid the same pattern to appear on the model. Such a repetition would destroy the illusion right away. To make that effect pop I needed to give depth to it. This is done by applying a very thin light grey line to the lower parts of such a damaged area - where the light would hit the small edge created by the damage. You do not need to be overly correct here and especially for areas where the sponge left a number of very tiny dots you just have to add a few tiny light grey dots to achieve the illusion. This part is always a lot of fun because of how great the effect looks when it is done.

The streaks are an even simpler technique. I am using AK Interactive Streaking Grime for this. The whole thing is a simple 2 step process. First I apply the grime pretty generously und rough where these grimes would show up in real life - corners and of course the damage effects that I had applied before. After it has dried thoroughly I use a q-tip or a brush to softly wipe over them with white spirit. This removes most of the color but leaves behind the nice streaks you can see all over the model. You can check on youtube for a number of good video tutorials explaining how to do this.

7. Finishing touches
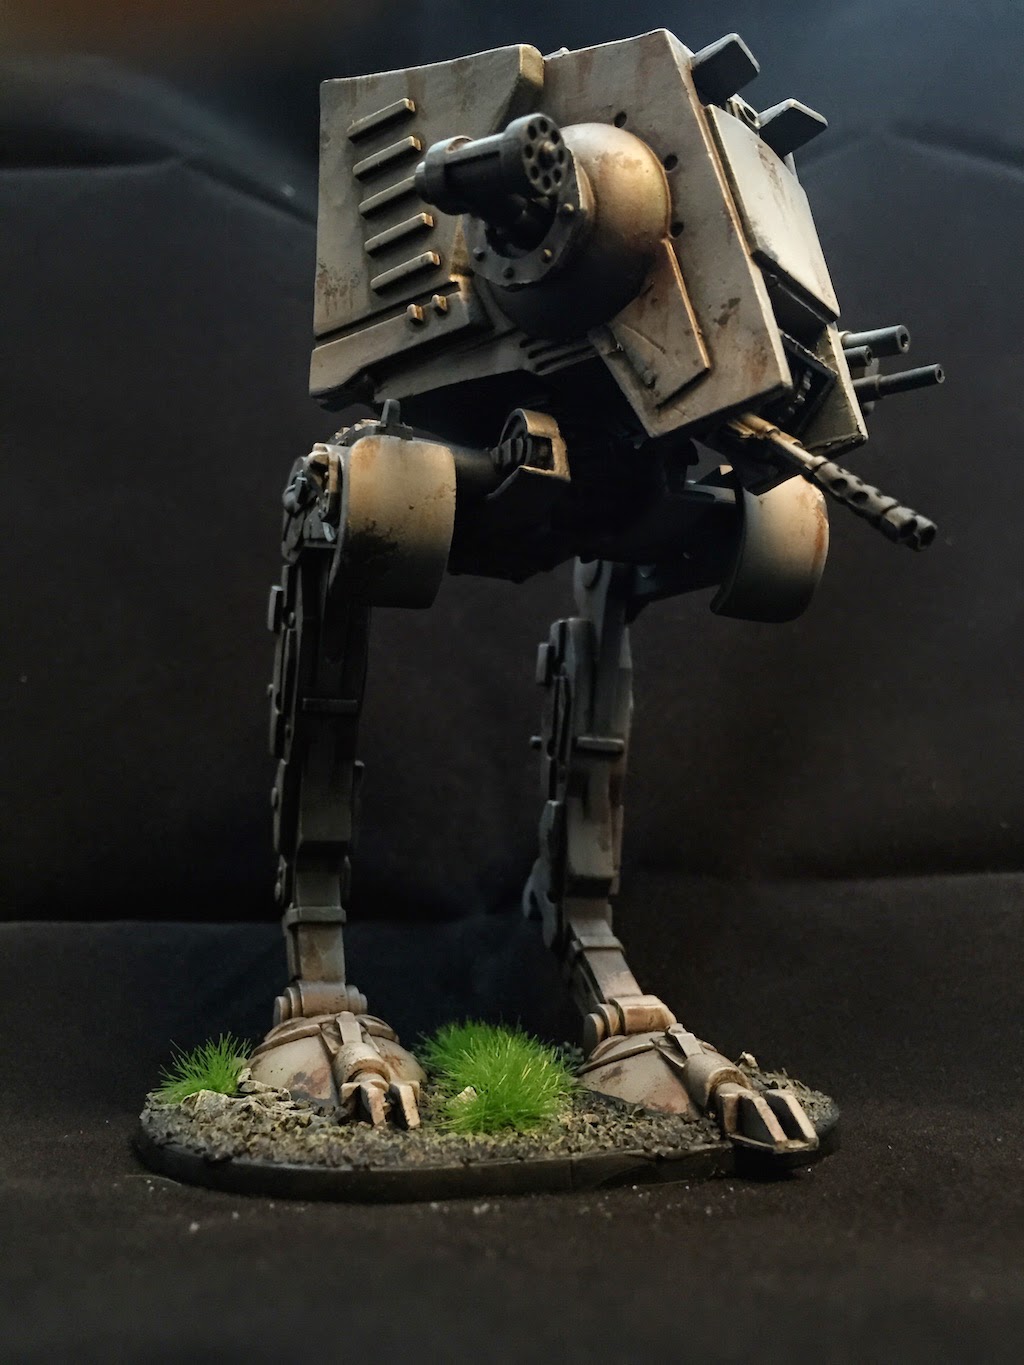
The last step is mainly about cleaning up and fixing up highlights that need are still missing. I also applied black to the ends of the gun barrels to simulate them being scorched by constant use.8. The base
One final detail was missing at the end - the base. Looking at the miniature at the end you clearly can see that it lacks color contrast a bit.So I decided to add a touch of color on the base. The few patches of very green grass give the whole miniature a very rounded overall look.


